再做 Oracle 11gR2 RAC+DG1
在https://www.roamway.com/1273.html 中,已配置好RAC数据库, 这次在RAC双机基础上配置DataGuard服务,
可以实现主库和备库之间快速切换, 提供容灾备份能力.
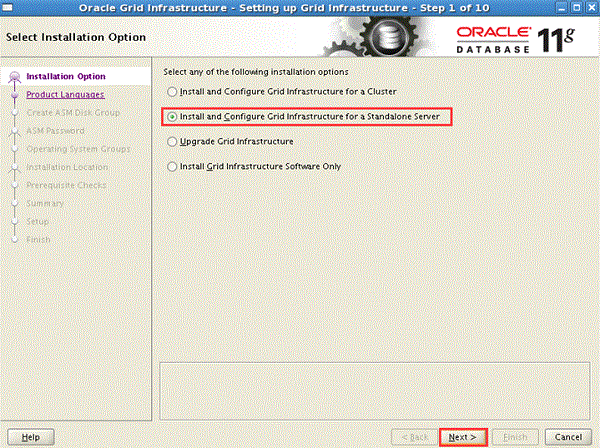
这一部分,我们需要部署好dataguard系统平台, 配置好ASM服务,然后安装单节点grid, 最后安装好oracle软件.
详情如下:
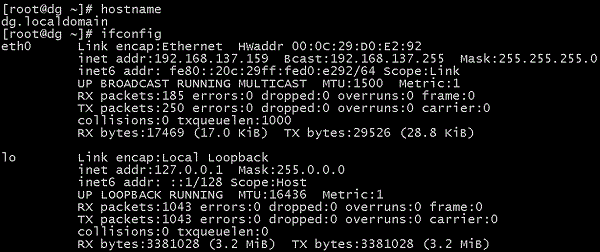
1. 安装操作系统, 这次依旧采用OEL5.5 x64 , 本地磁盘20GB, 主机名dg.localdomain ,
ip地址 192.168.137.159 ,不启用iptables和selinux.
定制时选择如下安装包:
桌面环境:
GNOME Desktop Environment
Applications:
Editors
Development:
Development Libraries
开发工具
GNOME Software Development
Legacy Software Development
X software Development
Base System :
Administration Tools
根据
Legacy Software Support
System Tools
X Window System
然后,执行真正安装,重启数次后安装完成.
下图是配置好的主机名和ip地址.
2. 建用户,建目录,赋权限 ,改口令,改用户配置文件,内核参数, 资源限制等
建立grid用户和oracle用户
groupadd -g 1000 oinstall
groupadd -g 1200 管理员
groupadd -g 1201 阿斯姆巴
groupadd -g 1202 阿斯莫珀
useradd -u 1100 -g oinstall -G asmadmin,阿斯姆巴,asmoper -d / home / grid -s / bin / bash -c ”
网格基础设施所有者” 格
回声 “格” | 密码 –标准输入网格
echo‘export PS1 =”`/ bin / hostname -s`-> “‘ >> /主页/网格/.bash_profile
回声 “export ORACLE_SID=+ASM” >> /主页/网格/.bash_profile
回声 “导出ORACLE_BASE = / u01 / app / grid” >> /主页/网格/.bash_profile
回声 “导出ORACLE_HOME = / u01 / app / 11.2.0 / grid” >> /主页/网格/.bash_profile
回声 “导出ORACLE_TERM = xterm” >> /主页/网格/.bash_profile
回声 “导出NLS_DATE_FORMAT =’yyyy / mm / dd hh24:我:ss'” >> /主页/网格/.bash_profile
echo‘export TNS_ADMIN = $ ORACLE_HOME / network / admin’ >> /主页/网格/.bash_profile
回声‘export PATH = / usr / sbin:$路径’ >> /主页/网格/.bash_profile
回声‘export PATH = $ ORACLE_HOME / bin:$路径’ >> /主页/网格/.bash_profile
回声‘export LD_LIBRARY_PATH = $ ORACLE_HOME / lib:/LIB:/的usr / lib’ >> /主页/网格/.bash_profile
回声‘export CLASSPATH = $ ORACLE_HOME / JRE:$ORACLE_HOME / jlib:$ORACLE_HOME / rdbms / jlib’ >>
/主页/网格/.bash_profile
回声 “export LANG = zh_CN” >> /主页/网格/.bash_profile
回声 “导出NLS_LANG = american_america.AL32UTF8” >> /主页/网格/.bash_profile
回声 “umask 022” >> /主页/网格/.bash_profile
groupadd -g 1300 dba
groupadd -g 1301 歌剧
useradd -u 1101 -g oinstall -G dba,歌剧,asmdba -d / home / oracle / -s / bin / bash -c
“Oracle软件所有者” 甲骨文
回声 “甲骨文” | 密码 –甲骨文
echo‘export PS1 =”`/ bin / hostname -s`-> “‘ >> /主页/oracle/.bash_profile
回声 “出口TMP = / tmp” >> /主页/oracle/.bash_profile
回显‘export TMPDIR = $ TMP’ >> /主页/oracle/.bash_profile
回声 “export ORACLE_HOSTNAME=dg.localdomain” >> /主页/oracle/.bash_profile
回声 “export ORACLE_SID=devdb” >> /主页/oracle/.bash_profile
回声 “导出ORACLE_BASE = / u01 / app / oracle” >> /主页/oracle/.bash_profile
echo‘export ORACLE_HOME = $ ORACLE_BASE / product / 11.2.0 / db_1’ >> /主页/oracle/.bash_profile
回声 “导出ORACLE_UNQNAME = devdb” >> /主页/oracle/.bash_profile
echo‘export TNS_ADMIN = $ ORACLE_HOME / network / admin’ >> /主页/oracle/.bash_profile
回声‘export PATH = $ ORACLE_HOME / bin:$路径’ >> /主页/oracle/.bash_profile
回声‘export LD_LIBRARY_PATH = $ ORACLE_HOME / lib:/LIB:/的usr / lib’ >> /主页/oracle/.bash_profile
回声‘export CLASSPATH = $ ORACLE_HOME / JRE:$ORACLE_HOME / jlib:$ORACLE_HOME / rdbms / jlib’ >>
/主页/oracle/.bash_profile
回声 “export LANG = zh_CN” >> /主页/oracle/.bash_profile
回声 “导出NLS_LANG = american_america.AL32UTF8” >> /主页/oracle/.bash_profile
回声 “导出NLS_DATE_FORMAT =’yyyy / mm / dd hh24:我:ss'” >> /主页/oracle/.bash_profile
建立grid和oracle目录路径,修改权限
mkdir -p / u01 / app / grid
mkdir -p /u01/app/11.2.0/grid
mkdir -p / u01 / app / oracle
chown -R甲骨文:oinstall / u01
chown -R网格:oinstall / u01 / app / grid
chown -R网格:oinstall /u01/app/11.2.0
修改/etc/security/limits.conf
回声 “甲骨文软件nproc 2047” >> /等/安全/limits.conf
回声 “oracle硬nproc 16384” >> /等/安全/limits.conf
回声 “甲骨文软件nofile 1024” >> /等/安全/limits.conf
回声 “甲骨文硬nofile 65536” >> /等/安全/limits.conf
回声 “网格硬nproc 16384” >> /等/安全/limits.conf
回声 “网格软nofile 1024” >> /等/安全/limits.conf
回声 “网格硬nofile 65536” >> /等/安全/limits.conf
修改/etc/profile文件
回声“如果 [ $USER = “甲骨文” ] || [ $USER = “格” ] ; 然后’ >> /等/配置文件
回声“如果 [ $外壳= “/bin / ksh” ] ; 然后’ >> /等/配置文件
回声‘ulimit -p 16384’ >> /等/配置文件
echo ‘ulimit -n 65536’ >> /等/配置文件
回声“ else’ >> /等/配置文件
回声‘ulimit -u 16384 -n 65536’ >> /等/配置文件
回声’ >> /等/配置文件
回声’ >> /等/配置文件
修改内核配置文件
回声 “fs.aio-max-nr = 1048576” >> /等/ sysctl.conf
回声 “fs.file-max = 6815744” >> /等/ sysctl.conf
回声 “kernel.shmall = 2097152” >> /等/ sysctl.conf
回声 “kernel.shmmax = 1054472192” >> /等/ sysctl.conf
回声 “kernel.shmmni = 4096” >> /等/ sysctl.conf
回声 “kernel.sem = 250 32000 100 128” >> /等/ sysctl.conf
回声 “net.ipv4.ip_local_port_range = 9000 65500” >> /等/ sysctl.conf
回声 “net.core.rmem_default = 262144” >> /等/ sysctl.conf
回声 “net.core.rmem_max = 4194304” >> /等/ sysctl.conf
回声 “net.core.wmem_default = 262144” >> /等/ sysctl.conf
回声 “net.core.wmem_max = 1048586” >> /等/ sysctl.conf
回声 “net.ipv4.tcp_wmem = 262144 262144 262144” >> /等/ sysctl.conf
回声 “net.ipv4.tcp_rmem = 4194304 4194304 4194304” >> /等/ sysctl.conf
3. 为ASM创建可用磁盘
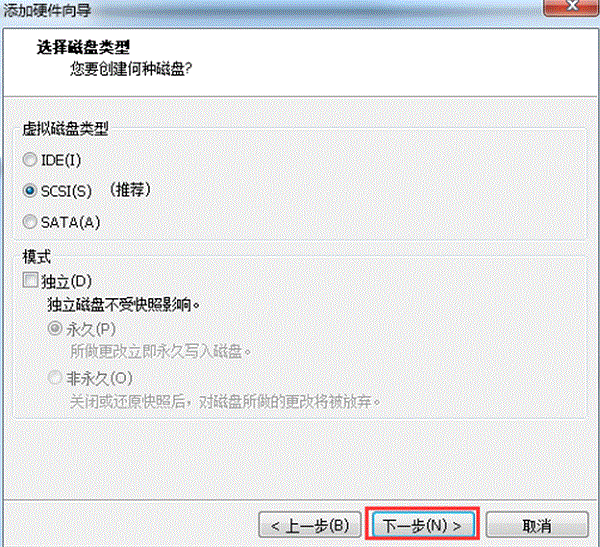
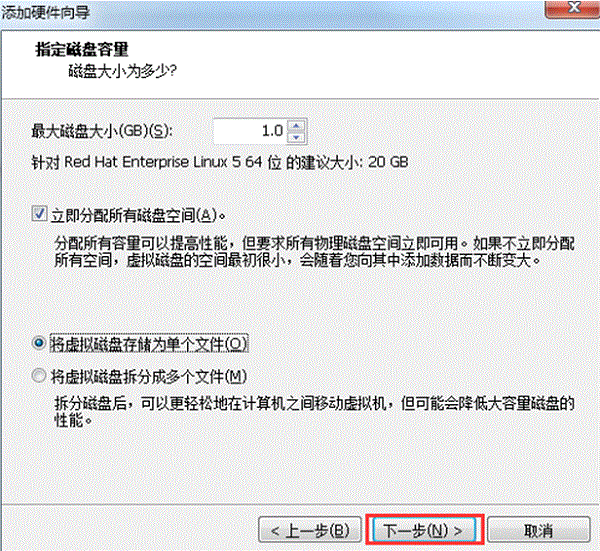
关闭dg服务器添加4块磁盘,大小分别是1GB,5国标,5国标,10国标,这4块盘分别作为
GRIDDG,数据,闪,RMAN备份盘使用。
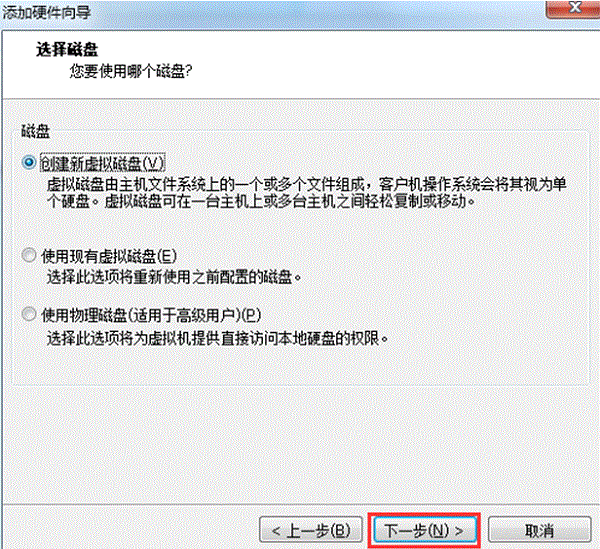
我们以创建1GB盘为例
这样GRIDDG盘就添加好了,然后用同样的办法添加DATA,闪,RMAN备份盘即可。
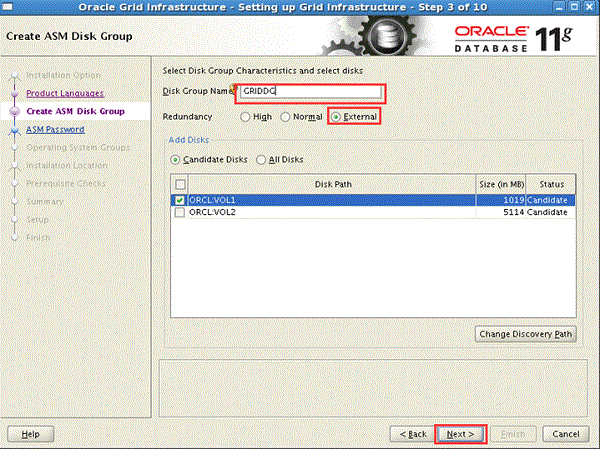
4.配置好ASM服务
准备好asm安装包
oracleasm-support-2.1.3-1.el5.x86_64.rpm
oracleasm-2.6.18-194.el5-2.0.5-1.el5.x86_64.rpm
oracleasmlib-2.0.4-1.el5.x86_64.rpm
用rpm -ivh安装这3个asm包即可
配置ASM驱动服务
/usr/sbin/oracleasm 配置 -i
/usr/sbin/oracleasm 初始化
/usr/sbin/oracleasm configure
/usr/sbin/oracleasm 状态
这时发现asm服务已经运行
格式化新磁盘,并创建ASM磁盘组
用fdisk命令查看一下刚才创建的磁盘,分别为/dev/sdb/ ,dev/sdc 和/dev/sdd 大小分别是1GB,5国标,5国标
接着使用fdisk 命令格式化这些磁盘,以/dev/sdb为例:
Device contains neither a valid DOS partition table, nor Sun, SGI or OSF disklabel
Building a new DOS disklabel with disk identifier 0x33318f33.
Changes will remain in memory only, until you decide to write them.
After that, of course, the previous content won’t be recoverable.
警告: invalid flag 0x0000 of partition table 4 will be corrected by w(rite)
警告: DOS-compatible mode is deprecated. It’s strongly recommended to
switch off the mode (command ‘c’) and change display units to
sectors (command ‘u’).
Command (m for help): ñ
Command action
e extended
p primary partition (1-4)
ñ
Partition number (1-4):
Value out of range.
Partition number (1-4): 1
First cylinder (1-130, 默认 1):
Using default value 1
Last cylinder, +cylinders or +size{K,中号,G} (1-130, 默认 130): 130
Command (m for help): w
The partition table has been altered!
Calling ioctl() to re-read partition table.
Syncing disks.
这样/dev/sdb就格式化好了,如下:
用同样的方法格式化dev/sdc 和/dev/sdd,/dev/sde/,不再一一演示了。
接着配置/dev/sdb , /dev/sdc , /dev/sdd 为ASM盘,方法如下:
/usr/sbin/oracleasm createdisk VOL1 /dev/sdb1
/usr/sbin/oracleasm createdisk VOL2 /dev/sdc1
/usr/sbin/oracleasm createdisk VOL3/dev/sdd1
对于/dev/sde不作为asm盘,而是格式化成ext3分区,然后挂载到/rman_backup目录下即可
至此,磁盘方面准备完成。
将grid软件,oracle软件分别上传到/home/grid和/home/oracle下
然后用unzip命令解压,将会得到grid安装目录和database安装目录
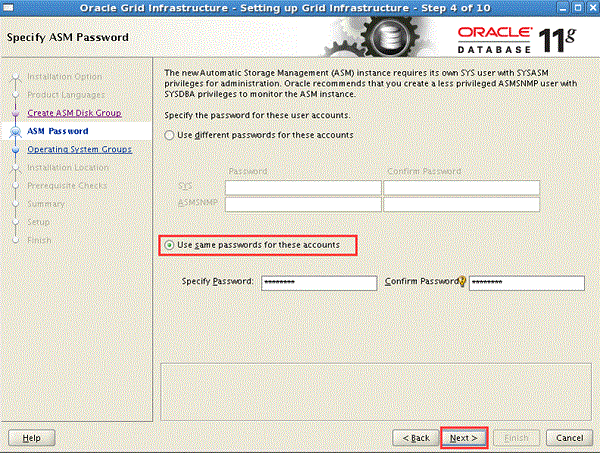
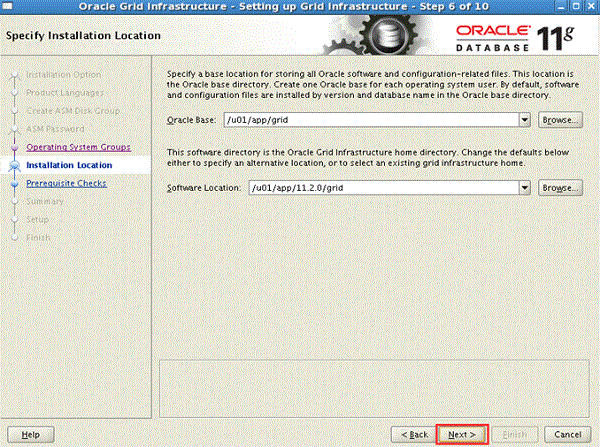
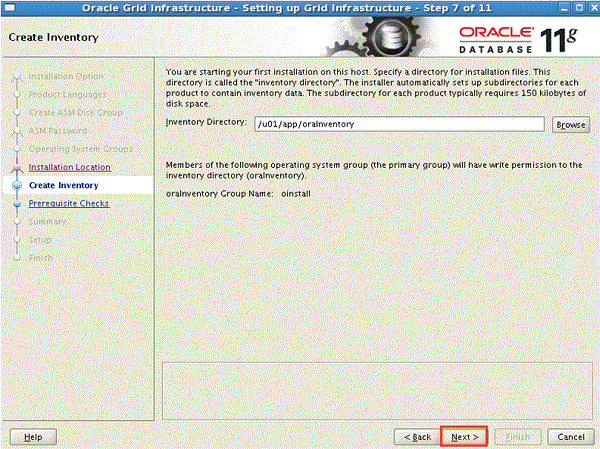
5. grid安装
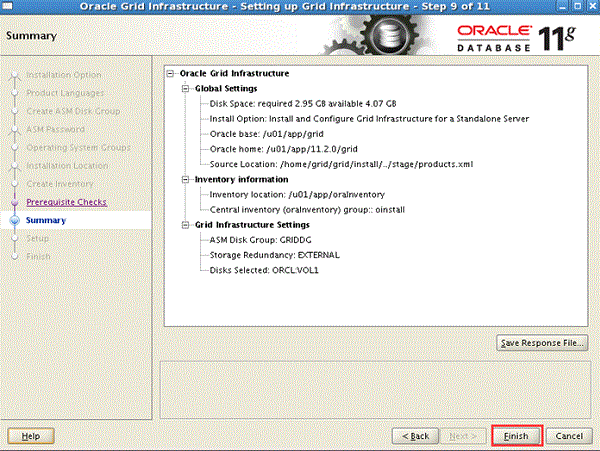
安装前检查,没有报错. 点击Finish开始安装
然后等待安装即可
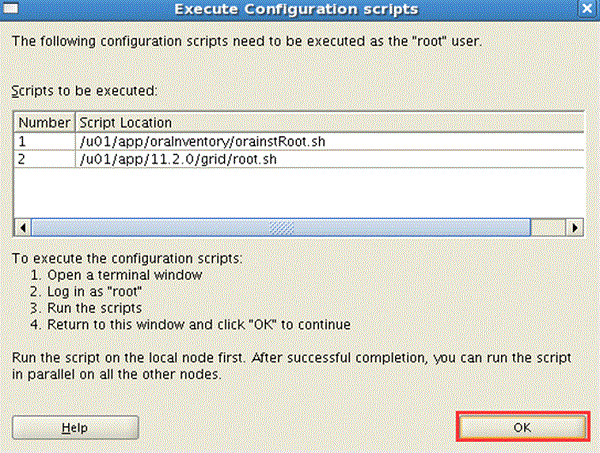
在最后阶段,执行两个脚本,orainstRoot.sh和root.sh
如果执行没有问题,则grid宣布安装完成。
看一下grid进程
切换到grid用户 , 执行crs_stat -t 发现grid进程出现了。
7. 安装oracle软件
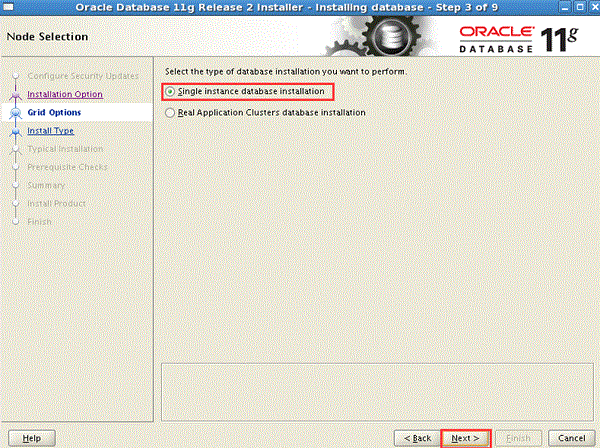
切换到oracle用户,执行runInstaller,安装过程和RAC中大体相同,不同部分如下:
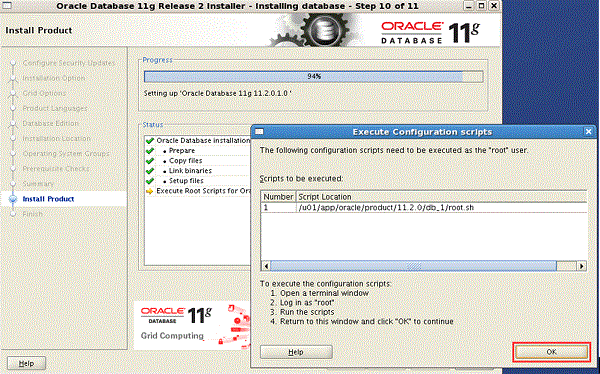
接着安装前检查,正式安装,执行脚本即可完成oracle安装
关于ASM磁盘组配置,RAC主库,DG备库会放到后面演示。

